Starting seeds indoors can be gratifying for some and frustrating for others. Until recently, my experience starting seeds indoors was in the frustrating category. My experience went something like this: buy seeds and the seed starting kit, plant the seeds, watch the seeds sprout, begin watering, watch plants grow tall and leggy and look nothing like the plants in stores, begin to harden the seedlings outside, check the seedlings a few hours later and realize they are not going to stand on their own, ditch the dead seedlings and buy plants from a store.
Frustrated, I began researching other methods to grow seeds indoors. I had to read so many articles on this because there was not one central article that answered all of my questions, so I hope you find this “how to” thorough and helpful. I first realized my problems stemmed from poor quality seeds and low lighting. Chances are these might be problems for you, too.
After years of starting seeds indoors, I have come to the realization that you must first begin with quality seeds. Quality seeds, for me, do not come from big department stores, but rather companies dedicated to raising flowers and vegetables. I have had great experiences with seeds bought from High Mowing Company and Natural Gardening. (I am not getting paid to say that. It is simply true. They deliver quality seeds you can count on to grow!)
Then, you must have the proper set up. You need fluorescent lights and heating pads. Seed starting information on the back of seed packets say to place your planted seeds by a window with sunlight. I don’t believe how much sunlight your window receives is enough. The reason plants get tall and leggy and don’t hold their own weight directly relates to not enough light. And when I say light, I mean the seeds need this fluorescent light about two inches above them.
In addition to florescent lights, a heat pad under the seeds will spark activity within the seed to begin to grow. If you are starting upwards of 30 seeds, you will probably want a shelf to hang your lights and place your seedlings.
1. Gather Materials
After you have your seeds, fluorescent lights, and heating pads, you will need the following materials:
- Seed Starting Soil
- Plastic Wrap
- Spray Bottle filled with water
- Tray
- Planting cups
Make sure your planting cups are clean. Since I reuse these year after year, I place them in a sink with bleach water to make sure to kill any bacteria in the cups.
2. Moisten Seed Starting Soil

I put the soil in a five gallon bucket and pour a few cups of warm water on the soil. Use your hands to mix the water and soil. You just want the soil a little moist–certainly not soaking. I use warm water to help raise the soil temperature. Seeds start with heat, water, and light. (Some seeds require darkness to sprout; check your seed packet on this. If it doesn’t say anything, assume the seed needs light.)
3. Put the soil into the planting cups

Lightly pack the soil into the cups. Seeds need to be able to move and push their roots downward, so don’t over pack the soil.
4. Place Seeds in Soil

These are lettuce seeds and are small. The back of the seed packet will tell how deep to plant the seeds. As a general guide, go off of the size of the seed and plant it as deep as the size of the seed. I like to plant 2 or 3 seeds per cup. Many times all the seeds will come up, and you can replant the seedlings into another cup of soil or cut off all but one seedling. (I’ll have a future post dedicated to replanting a seed sprout.)
5. Lightly Mist Soil
 After the seeds are planted, I get a spray bottle and fill with warm water. Make sure the water bottle doesn’t shoot out a hard stream of water; you want a mist. Mist the soil. You do not want puddles of water. You are aiming for a nice even misting of the soil.
6. Cover the planted seeds with plastic wrap.

Cover the planted seeds with plastic wrap to keep the moisture with the seeds. As you plant, you will want to label the cups in some way. I use craft sticks and label the rows. I don’t place the craft stick under the plastic wrap. I just tuck the craft stick in between the cup and tray.
7. Place the tray under light and on heating pad.


Make sure the light is about two to three inches above the planted seeds. I have the fluorescent lights on chains with S-hooks so I can raise the lights up as the seedlings grow. I place heating pads under my trays because my seeds are grown in a utility room that is not heated. If you are placing the seeds in your heated house, you may not need a heating pad.
8. Wait
For the next 5-7 days, your job is easy. Turn off the lights at night. You want to mimic daylight hours. The seeds need rest just like we do. Don’t open the plastic wrap until most of your seeds have sprouted. If you begin to see condensation on the plastic wrap, that is a good sign! It means the soil is moist and you have optimal growing conditions.
Once the seeds sprout, I continue watering with the spray bottle until the first set of leaves appear. Your seeds don’t need fertilizer to help them grow. That little seed is packed with enough energy on its own to get the seed off to a good start.
Using this method, starting seeds indoors is now gratifying. The initial set up involves cost, but if used year after year, the cost of your garden will decrease because you won’t have to buy plants from stores. In addition, starting your own seeds allows you to chose the varieties of tomatoes, peppers, and other vegetables you wish to grow!
Check back for updates. I’ll be sharing with you the progress of these seedlings. You can subscribe here and get the most recent post sent to your inbox.
Enjoy planting!
-Jill


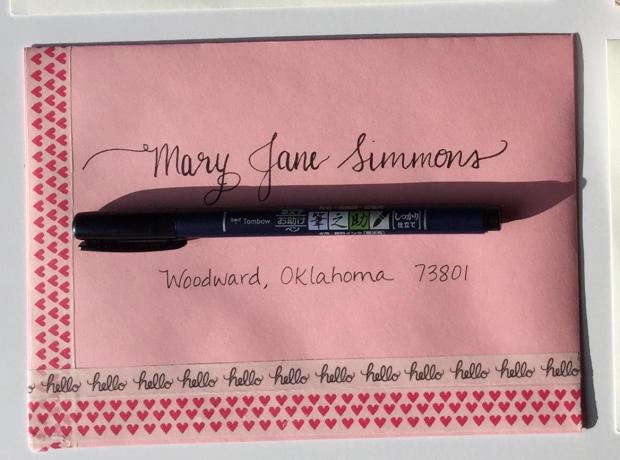
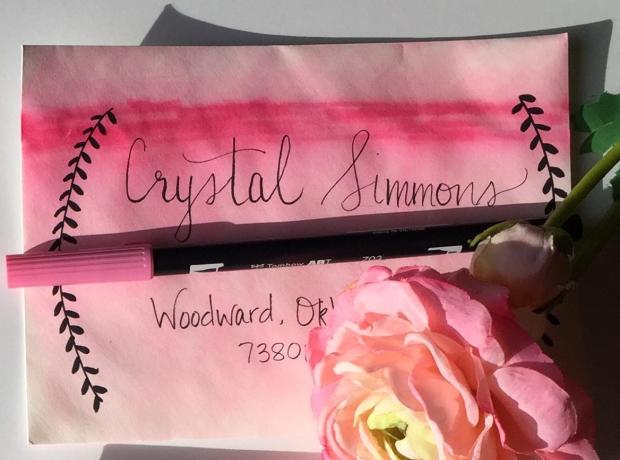
 Now, fill in the name inside the banner and outline the banner. Write the address inside the lower part of the circle. Next, add hearts and flowers around the border. Fill in the border with green leaves. Finish the circle wreath with some small dot bursts and any additional flourishes you wish. Then, erase any pencil lines. Add the return address to the back of the envelope and add a stamp. Materials used:
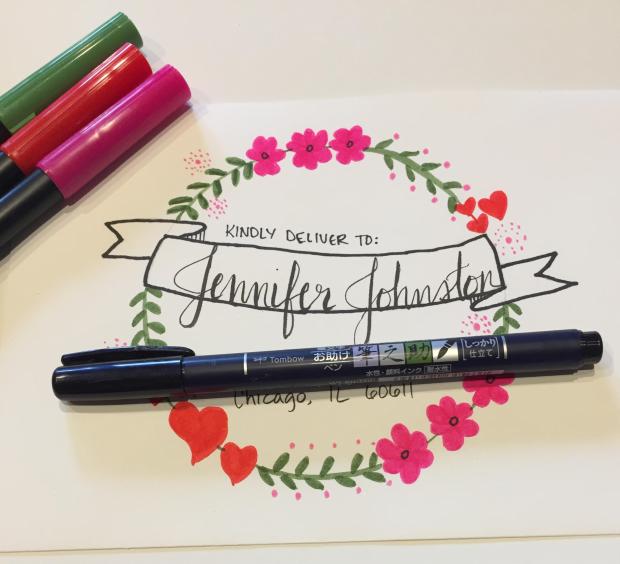
 Then, immediately run your paintbrush with water over the envelope, vertically. The ink will not have dried yet and you can create an ombre look using vertical strokes as you run the paintbrush from the top of the marker strip to the bottom of the envelope. Working quickly so you get to the entire length of the envelope, continue dipping your paintbrush in water and then making vertical strokes from the marker strip to the bottom of the envelope.
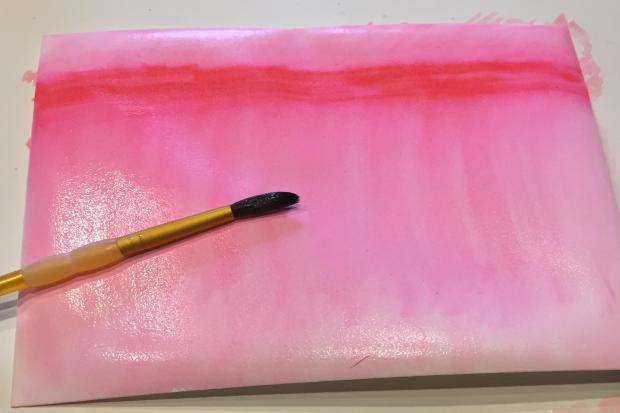
 Wait for the envelope to dry completely and then add the address. I added some leaf detail to the envelope, too. Materials used:
  Now, before the ink has dried, get your paintbrush in water and make vertical strokes from the top of the marker strip downward. You are only going a few inches down for the Watercolor Swash envelope.
 Once the water has dried, use a white gel ink pen to address the envelope. Place the return address on the back of the envelope, add a stamp, and send your lovely piece of mail. Materials used: